Operating system (OS) updates can be installed on HyperScale nodes to ensure that the OS has the most recent updates.
Before You Begin
-
CommServe and HyperScale nodes must be in Service Pack 21 (or higher).
-
Verify the version in the clients associated with the CommServe server and HyperScale nodes before upgrading the OS. For more information, see Viewing the Service Pack Details for One or More Clients.
-
Verify the Commvault Distributed Storage (CDS) RPM version on the HyperScale node. For instructions, see Identify the <Commvault Distributed Storage (CDS) RPM Version on HyperScale X Appliance.
-
The update process updates provided by Red Hat for the OS and Commvault Distributed Storage (CDS) RPMs.
-
The process does not update other RPMs that may have been manually installed on the nodes, including other third-party RPMs that may have been manually installed on the nodes.
-
If you use a tape library on the Hyperscale nodes, you must upgrade the corresponding Linux tape driver (lin_tape), when the Kernel associated with the OS is upgraded. For more information, see Tape Library Support for HyperScale X Appliance.
Procedure
-
Verify that the remote cache is set up on one of the HyperScale nodes in the existing storage pool using the following steps:
(By default, the remote cache is configured in one of the nodes when a storage pool is configured. It is important to verify and confirm the availability of the remote cache in one of the nodes in the existing storage pool.)
-
From the navigation pane, go to Manage > System > Maintenance.
The Maintenance page appears.
-
Click Download/copy software.
The Download/copy software section appears, showing the current feature release, the latest available feature release, and the last job that was run.
-
Click Schedule Job
 .
.The Download/copy software dialog box appears.
-
In Remote caches to sync, expand Servers and make sure that one of the nodes in the cluster is listed. (This is automatically created when you configure the storage pool.)
Note
If there are multiple HyperScale clusters on a CommServe, one remote cache is required for each cluster.
If one of the nodes from the cluster is not listed, setup the remote cache on a node that has the DDB configured, to make sure that the remote cache is setup on one of the HyperScale nodes in the cluster. The OS updates will be installed, (or orchestrated) from this node. For more information, see Setting Up a Remote Cache on a Client Computer.
-
Click Cancel to close the dialog box.
-
-
Download the latest updates and populate the remote cache as follows:
-
From the navigation pane, go to Manage > System > Maintenance.
The Maintenance page appears.
-
Click Download/copy software.
The Download/copy software section appears, showing the current feature release, the latest available feature release, and the last job that was run.
-
Click Run job
 .
.The Download/copy software dialog box appears.
-
Select Download software using Internet or Local Copy, depending on your environment.
-
In Download installation media, select the available feature release or maintenance release installation files that you want to download.
-
In Operating system options, select the Unix check box, and then select Linux x86_64 from the drop-down list.
Note
The latest OS updates will be downloaded, irrespective of the selected option.
-
In Remote caches to sync, select the HyperScale node in which the remote cache is configured.
-
Click Download.
Monitor the progress of the download job to ensure that the software is successfully downloaded and synchronized. For more information, see Viewing Jobs.
-
-
Set the MediaAgents associated with the nodes in the Maintenance mode. For more information, see Setting the MediaAgent on Maintenance Mode.
Important
Make sure that all the MediaAgents in the storage pool are set in the maintenance mode before proceeding to the next step.
-
On the system console (for example, using KVM, not SSH) of the node on which the remote cache is configured, press Ctrl+Alt+F2 to get to login prompt, log on to the node, and then navigate to the following folder:
/opt/commvault/MediaAgent
-
Update the CDS binaries using the following command:
# ./cvupgradeos.py -upgrade_hedvig_onlyNote
cvupgradeos.pymust be run using the console. Do not runcvupgradeos.pyusing SSH.Alternately update the CDS binaries using the following command in the non-disruptive mode:
# ./cvupgradeos.py -upgrade_hedvig_only_non_disruptiveNon-disruptive mode prevents the nodes from going into maintenance mode and as a result the operational status, especially for restore operations, will be uninterrupted.
-
Update the operating system binaries using following command:
# ./cvupgradeos.py -upgrade_os_onlyThe following prompt will be displayed:
Performing some pre-upgrade checks ... please wait...
You are attempting to perform OS upgrade of cluster nodes.
This will bring down cluster services/volume and reboot the nodes one after the other
Following nodes will be upgraded:
        mynode001.company.com
        mynode002.company.com
        mynode003.company.com
Please confirm if you want to upgrade at this time (y/n):
Important
Verify and ensure that all the nodes in the cluster are listed in the output.
-
Type
yand pressEnterto continue.CommServe VM will now be shutdown and powered off.
The installation process will start. The progress of the installation is displayed. (The sequence is also logged in /var/log/commvault/Log_Files/cvupgradeos.log.)
Note the following:
-
The updates will be installed sequentially on each HyperScale node available in the current cluster.
-
At the end of update installation, each node will be rebooted before moving on to the next node.
-
The remote cache node (or the node from which the OS updates are installed) will be the last node to reboot. The upgrade will automatically resume after the reboot but may take some time to complete the post upgrade operations in this node.
-
-
Once the last node has rebooted, log back into the node and navigate to the following folder:
/opt/commvault/MediaAgent
-
Once the installation is completed, check the status of the installation using the following command:
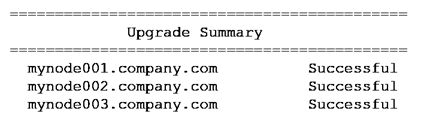
# ./cvupgradeos.py -statusThe resumed process will be displayed, however, if the process has completed, a message similar to the following will be displayed:
If there is a failure, investigate the reason for the failure in /var/log/commvault/Log_Files/cvupgradeos.log. Correct the issue causing the failure and then rerun
cvupgradeos.pyto install the updates in the failed node. -
Restart the CommServe VM using the following command:
# virsh start <virtual_machine>
For more information on starting the CommServe VM, see Starting and Stopping the CommServe VM.
-
Using the Command Center, remove the MediaAgents associated with the nodes from Maintenance mode. For more information, see Setting the MediaAgent on Maintenance Mode.
Result
-
The updates will be installed in all the HyperScale nodes.
-
If the OS version is upgraded, you can verify the OS version as follows:
-
From the navigation pane, go to Manage > Server groups.
The Server groups page appears.
-
The server name, OS version, and other details are displayed for each server in the server group.
-